| 失效链接处理 |
|
fastDFS部署 PDF 下载
本站整理下载:
相关截图:

主要内容:
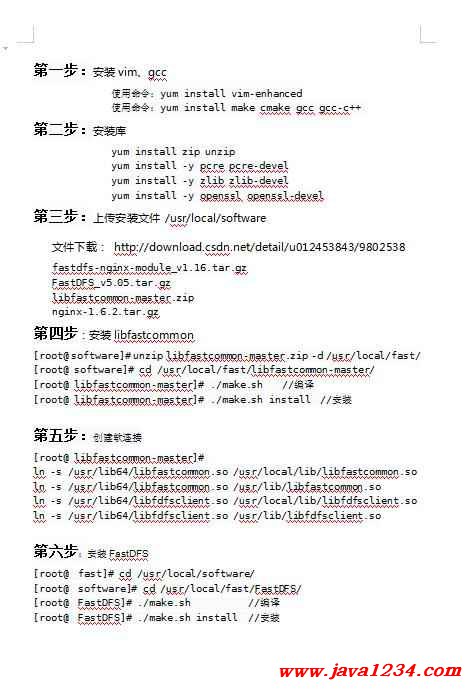
第一步:安装vim、gcc
使用命令:yum install vim-enhanced
使用命令:yum install make cmake gcc gcc-c++
第二步:安装库
yum install zip unzip
yum install -y pcre pcre-devel
yum install -y zlib zlib-devel
yum install -y openssl openssl-devel
第三步:上传安装文件 /usr/local/software
文件下载: http://download.csdn.net/detail/u012453843/9802538
fastdfs-nginx-module_v1.16.tar.gz
FastDFS_v5.05.tar.gz
libfastcommon-master.zip
nginx-1.6.2.tar.gz
第四步:安装libfastcommon
[root@ software]# unzip libfastcommon-master.zip -d /usr/local/fast/
[root@ software]# cd /usr/local/fast/libfastcommon-master/
[root@ libfastcommon-master]# ./make.sh //编译
[root@ libfastcommon-master]# ./make.sh install //安装
第五步:创建软连接
[root@ libfastcommon-master]#
ln -s /usr/lib64/libfastcommon.so /usr/local/lib/libfastcommon.so
ln -s /usr/lib64/libfastcommon.so /usr/lib/libfastcommon.so
ln -s /usr/lib64/libfdfsclient.so /usr/local/lib/libfdfsclient.so
ln -s /usr/lib64/libfdfsclient.so /usr/lib/libfdfsclient.so
第六步:安装FastDFS
[root@ fast]# cd /usr/local/software/
[root@ software]# cd /usr/local/fast/FastDFS/
[root@ FastDFS]# ./make.sh //编译
[root@ FastDFS]# ./make.sh install //安装
安装完成后查看服务脚本如下:
[root@ FastDFS]# cd /etc/init.d/ && ls | grep fdfs
fdfs_storaged
fdfs_trackerd
[root@ init.d]#
配置文件位置如下:
[root@fastdfs init.d]# cd /etc/fdfs/
[root@fastdfs fdfs]# ll
总用量 20
-rw-r--r--. 1 root root 1461 4月 11 04:10 client.conf.sample
-rw-r--r--. 1 root root 7829 4月 11 04:10 storage.conf.sample
-rw-r--r--. 1 root root 7102 4月 11 04:10 tracker.conf.sample
[root@fastdfs fdfs]#
因为FastDFS服务脚本设置的bin目录为/usr/local/bin/下,但是实际我们安装在了/u sr/bin/下面。所以我们需要修改FastDFS配置文件中的路径,也就是需要修改两个配置文件
使用命令
vim /etc/init.d/fdfs_storaged
vim /etc/init.d/fdfs_trackerd
进入编辑模式,然后直接输入":",光标会定位到最后一行,在":"后输入"%s+/usr/local/bin+/usr/bin",如下图所示。输入完之后回车,会提示修改了7处。为了确保所有的/usr/local/bin都被替换了,我们可以再打开文件确认一下。
|


 苏公网安备 32061202001004号


